Special campaign:
to access and preserve NAVD 88.Share your geodetic observations with NGS!
- your GNSS static base data help densify our CORS network
- your GNSS static rover data improve survey marks ties to the national network
- your GNSS static campaigns and leveling surveys densify networks via bluebooking
- your mark descriptions and photos update our records via all tools below:
| use | use | use | use | |||
|---|---|---|---|---|---|---|
recovery |
DSWorld or new:BETA |
OPUS share |
WinDesc |
|||
| to update mark* | to update mark* | to create+update mark | to create+update | |||
| visibility | visibility | visibility (OPUS provides) position (OPUS provides) |
← |
|||
| position | position | |||||
| condition | condition | condition | ||||
| notes | notes | notes | ||||
| photos | photos | photos | ||||
| stamping | stamping | stamping | ||||
| designation | designation | |||||
| type | type | type | ||||
| setting | setting | setting | ||||
| rod depths | ||||||
| application | application | |||||
| magnetic | magnetic | magnetic | ||||
| stability | stability | stability | ||||
| equip. IDs | ||||||
* |
* |
 |
||||
| * these only update marks which are already published |
||||||
Tools:
- find published and shared marks
- observer field log and other survey forms [optional]
- for more detail, see the Description Processing Handbook and datasheet data format
YES, SUITABLE

YES or NO, depending on locality

NO, UNSUITABLE

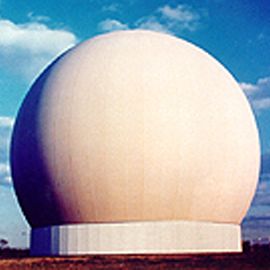
Marks should have a generally open view of satellites passing overhead, with few large obstructions nearby (buildings, trees, wires.)
Older marks, set before the satellite era, are often unsuitable.
Tools:
- visibility obstruction diagram [optional]

Many older bench marks were positioned using only scaled map coordinates. If you have a more accurate position, please report it. Acceptable positions to supersede SCALED come from the following sources:
- HD_HELD2 = ±10 m, consumer-grade GPS with or without WAAS correction.
- HD_HELD1 = ± 3 m, engineer-grade GPS with differential or kinematic correction in NAD 83.
- ADJUSTED = A few cm, from a least squares adjustment of geodetic survey project data.
Geodetic control datasheets report accuracy bounds for each position value. These accuracies are estimated from the survey technique used and the coherence of the survey within the existing network and describe a 95% confidence region surrounding the datum point. Separate local and network accuracies describe the tolerances to adjacent, directly connected marks and to the NSRS network as a whole, respectively. See FGDC accuracy standards for details.
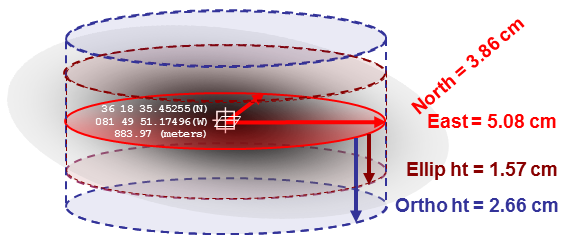
To describe a mark using OPUS,
first upload the mark's GPS data 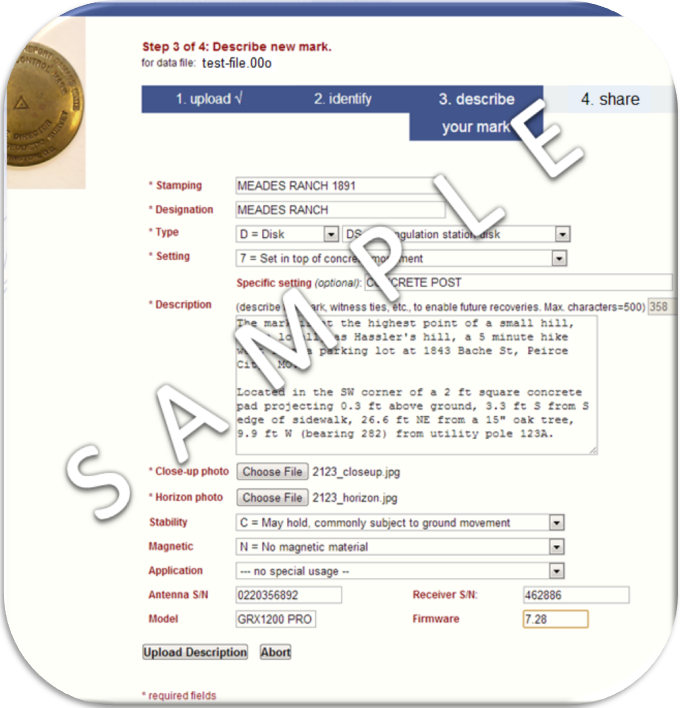 using
or
then identify the mark's PID, if any.
using
or
then identify the mark's PID, if any.
Why bother?
Good, consistent, reliable descriptions help datasheet users appraise a mark's fitness for use and aid in mark recovery.
To this aim, the primary mark descriptors are illustrated below.
- condition
- notes
- photos
- stamping
- designation
- type
- setting
- rod depths
- application
- magnetic
- stability
- equip. IDs
These descriptive elements are common to OPUS sharing, OPUS projects and mark recovery.
Tools:
- observer field log [optional]
- other description tools (↑top)
GOOD
No evidence of tampering,
subsidence, frost heave, etc.
It is likely where it was
when first observed.
NOT FOUND

Existence doubtful; recovery un-
likely without extraordinary effort.
DESTROYED
Irrefutable evidence of destruction.
Absent such first-hand evidence,
report as "not found"
Provide details to help future users recognize disturbance, and confidently locate marks hidden by overgrowth or within aerial imagery.
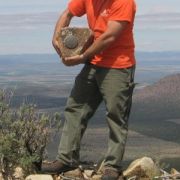
NEW MARKS:
Describe by noting distance and direction from local witnesses (curbs, posts, trees, etc.) along with any other salient features (recommended approach, hazards, etc.)Example: The mark is at the highest point of a small hill, known locally as Hassler's hill, a 5 minute hike west from a parking lot at 1843 Bache St, Peirce City.
Located in the SW corner of a 2 ft square concrete flag base projecting 0.3 ft above ground, 3.3 ft S from S edge of sidewalk, 6.6 ft NE from a 15" oak tree, 9.9 ft W (bearing 282) from utility pole 123A.
PUBLISHED MARKS:
Briefly update prior descriptions.Example: Recovered as described in 1983, except utility pole 123A is gone. Mark is 32.1 ft south from centerline of gravel drive leading to 1874 Patterson Ave, now known as Hilgard Park.
Example: Recovered as described.
HINTS: Avoid the traditional turn-by-turn to-reach paragraphs, if a dashboard GPS will direct users to the vicinity.
No reference objects nearby? Consider adding and describing your own witness post, rock cairn, or gravel collar.
Tools:
- mark description / recovery forms [optional]
- consider other recovery note and photo archives, e.g., geocaching websites.
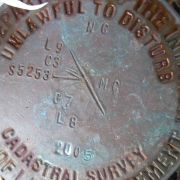
CLOSE-UP

highlight stamping with chalk or crayon,
use macro mode to reduce blur,
oblique angle to reveal mark condition,
avoid shadows
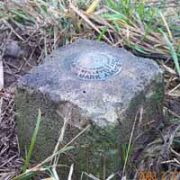
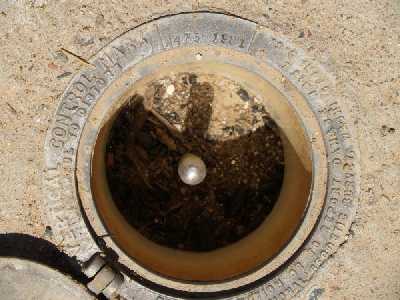
EYE-LEVEL

remove dirt & debris to show extents
of monument, open the logo cap,
add a placard to identify mark
and demonstrate scale
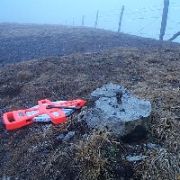
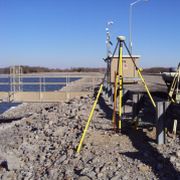
HORIZON

include witnesses &/or visibility obstructions
to aid in recovering mark & identifying within
aerial imagery, show equipment used to
document your work & clarify mark location
Please only share photos which add unique and unambiguous views of a mark's location, condition, or utility for future surveys.
Tools:
- see also photo guidelines for DSWORLD/WinDesc and contracting SOW and CORS.
- consider also other recovery note and photo archives, e.g., geocaching websites.

Stamping is the unique ID, if any, that the original marksetter struck into the tablet.
Example: "MEADES RANCH 1891" as shown at right.
Do not physically alter an existing mark unless you are conducting a formal mark reset.
Designation (aka "name") is a user-friendly identifier, unique for the area and usually descriptive of the mark stamping &/or location.
Examples: MEADES RANCH
WASHINGTON MONUMENT
Q 132 RESET
Tools:
- search our database by mark designation to ensure your proposed designation is unique
- see bluebook annex D for historic naming conventions
Knowing what to look for improves mark recovery and may explain stability problems.
Tools:
- Don't see your mark type? Choose "see description".
- Nominate a new, common marker type.
Specific setting allows you to add comments about the setting, e.g., "4x8 ft concrete storm drain". These improve mark recovery and may explain stability problems.
Survey marks should be stable, permanent, unique, recoverable, and safe-to-use. Improve the network by finding & re-using existing marks whenever practicable.
Tools:
- see mark setting guidelines at bench mark reset, NOAA Manual NOS NGS 1, and contract attachments T, U, and V
- Don't see your mark setting? Choose "Unspecified".
- Nominate a new, common marker setting.

Rod and sleeve depths refer to the lengths of material used to construct a rod mark, useful in judging stability and subsidence. Don't report depth values unless you set the mark &/or have specific knowledge of the lengths.
![]() User note: Rods may flex during installation, the true "depth" below ground may be less than the recorded length.
User note: Rods may flex during installation, the true "depth" below ground may be less than the recorded length.
PLSS CORNER
Cadastral boundary corner of
US Public Land Survey System
WATER LEVEL / TIDAL BENCH
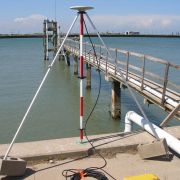
A reference mark for a water
level measuring gauge
FAULT MONITORING
Established to monitor local
or regional crustal instability
We highlight just a few common uses, to aid in organization and search.
Some historic applications are implied by the designation format (annex D).
Cadastral surveyors occasionally include magnetic material
in or alongside the setting to aid in mark recovery.
This is generally avoided for geodetic marks.
![]() NOT MAGNETIC: Copper, brass, aluminum, and stainless steel
NOT MAGNETIC: Copper, brass, aluminum, and stainless steel
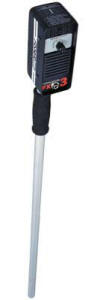
MAGNETIC: iron, cobalt or nickel alloys
UNSURE? Use a magnet to test.
Stability is your best estimate of the mark's ability to maintain a long-term, constant position relative to other local features.
Consider the setting quality, soil type, threats from construction or traffic, etc.
see about OPUS for explanation.
Example: "TRM29659.00" below.

Antenna S/N:
serial #, usually found on a label underneath the antenna.
Example: "0220356892" above.
the brand name.
Example: "GRX1200 PRO" below.

Receiver S/N:
serial #, usually found on a label on the back of the unit.
Example: "462886" above.
Receiver Firmware:
usually found within the receiver config. menu.
Example: "7.28".
Why bother?
Recording the equipment used in your observation could facilitate tracking to isolate performance problems.

